In this series of tutorial, we ‘ll learn together cross-platform mobile application development thanks to Xamarin forms.
We’ll use Forms WebAPI project created in Angular 8 tutorial series.
You can download the source code from GitHub.
Xamarin history:
Lest’s take a look to the Xamarin history from Wikipedia:
Xamarin is a Microsoft-owned San Francisco-based software company founded in May 2011 by the engineers that created Mono, Xamarin.Android (formerly Mono for Android) and Xamarin.iOS (formerly MonoTouch), which are cross-platform implementations of the Common Language Infrastructure (CLI) and Common Language Specifications (often called Microsoft .NET).
With a C#-shared codebase, developers can use Xamarin tools to write native Android, iOS, and Windows apps with native user interfaces and share code across multiple platforms, including Windows, macOS, and Linux. According to Xamarin, over 1.4 million developers were using Xamarin’s products in 120 countries around the world as of April 2017.
On February 24, 2016, Microsoft announced it had signed a definitive agreement to acquire Xamarin.
Creation new project
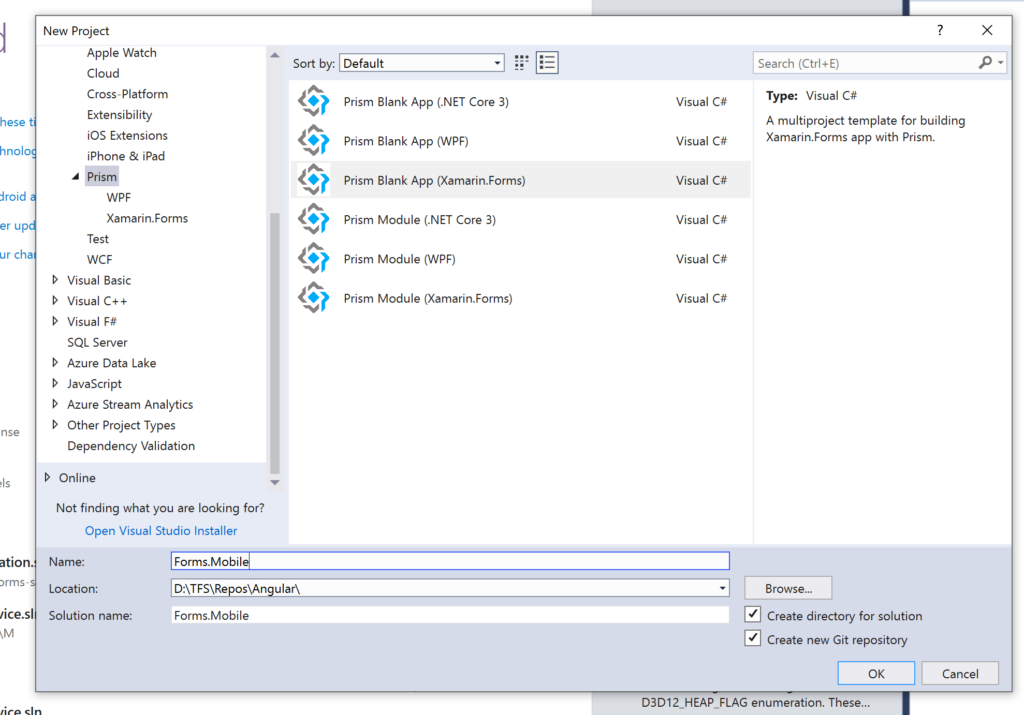
The easiest way to create a Xamarin Forms project based on Prism framework, is to use Visual Studio extension. You can download from the Visual Studio Gallery.
After you’ve installed it, you will find a new section called Prism. The template we’re interested into is called Prism Blank App (Xamarin.Forms):

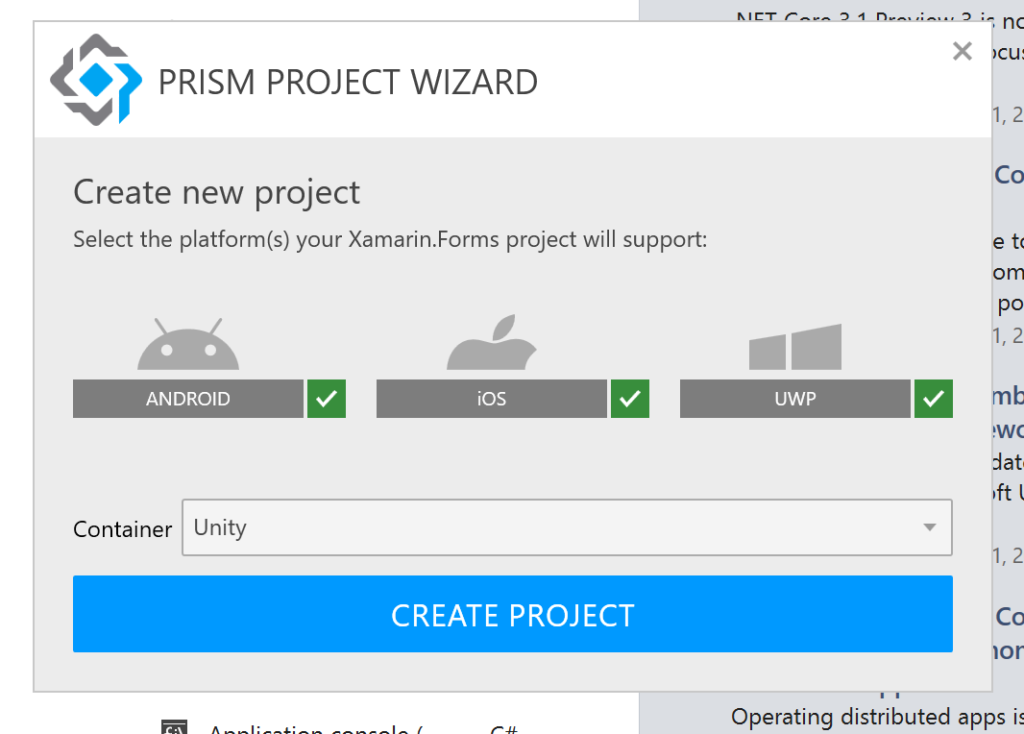
As you can see, you have the possibility to choose the target platforms and the IOC container.

Click on create project. Your project solution contains 4 projects:
Forms.Mobile : Is the shared project which contains the Views and ViewModels folders. Views are developed by xaml language, if you are familiar with WPF development, you will find that it is the same logic of development.
The 3 others project are named by Forms.Mobile.TargetPlatform like Forms.Mobile.Android
The goal of Xamarin Forms is making 3 different applications on different platform based on the same code.
App.xaml.cs
This class is the entry point of your application. It’s contains 2 main methods OnInitialized, in which we define the first page to navigate to when the application is running and RegisterTypes method, in which you can register you dependencies like services and the binding between View and ViewModel.
We need to make some changes before beginning the development by changing the default inheritance to PrismApplication:
using Prism;
using Prism.Ioc;
using Forms.Mobile.ViewModels;
using Forms.Mobile.Views;
using Xamarin.Forms;
using Xamarin.Forms.Xaml;
using Prism.Unity;

[assembly: XamlCompilation(XamlCompilationOptions.Compile)]
namespace Forms.Mobile
{
    public partial class App: PrismApplication
    {
        /*
         * The Xamarin Forms XAML Previewer in Visual Studio uses System.Activator.CreateInstance.
         * This imposes a limitation in which the App class must have a default constructor.
         * App(IPlatformInitializer initializer = null) cannot be handled by the Activator.
         */
        public App() : this(null) { }

        public App(IPlatformInitializer initializer) : base(initializer) { }

        protected override async void OnInitialized()
        {
            InitializeComponent();

            await NavigationService.NavigateAsync("NavigationPage/MainPage");
        }

        protected override void RegisterTypes(IContainerRegistry containerRegistry)
        {
            containerRegistry.RegisterForNavigation<NavigationPage>();
            containerRegistry.RegisterForNavigation<MainPage, MainPageViewModel>();
        }
    }
}
The IPlatformInitializer parameter is null by default, but it can be redefined in case you need to register in the dependency container some specific classes that exists only in a platform specific project (Middleware for example ) .
You will find, that every platform specific project has its own custom initializer class.
ViewModelBase
In ViewModels folder, you can see that we have a classe called ViewModelBase. This will be the default parent class for all ViewModels that will be created.
In this parent class, we define the common behavior between ViewModel like The page Title or the NavigationService. The goal of this class is factorization of the code, avoid duplication and facilitate code maintenance.
using Prism.Commands;
using Prism.Mvvm;
using Prism.Navigation;
using System;
using System.Collections.Generic;
using System.Text;

namespace Forms.Mobile.ViewModels
{
    public class ViewModelBase : BindableBase, IInitialize, INavigationAware, IDestructible
    {
        protected INavigationService NavigationService { get; private set; }

        private string _title;
        public string Title
        {
            get { return _title; }
            set { SetProperty(ref _title, value); }
        }

        public ViewModelBase(INavigationService navigationService)
        {
            NavigationService = navigationService;
        }

        public virtual void Initialize(INavigationParameters parameters)
        {

        }

        public virtual void OnNavigatedFrom(INavigationParameters parameters)
        {

        }

        public virtual void OnNavigatedTo(INavigationParameters parameters)
        {

        }

        public virtual void Destroy()
        {

        }
    }
}
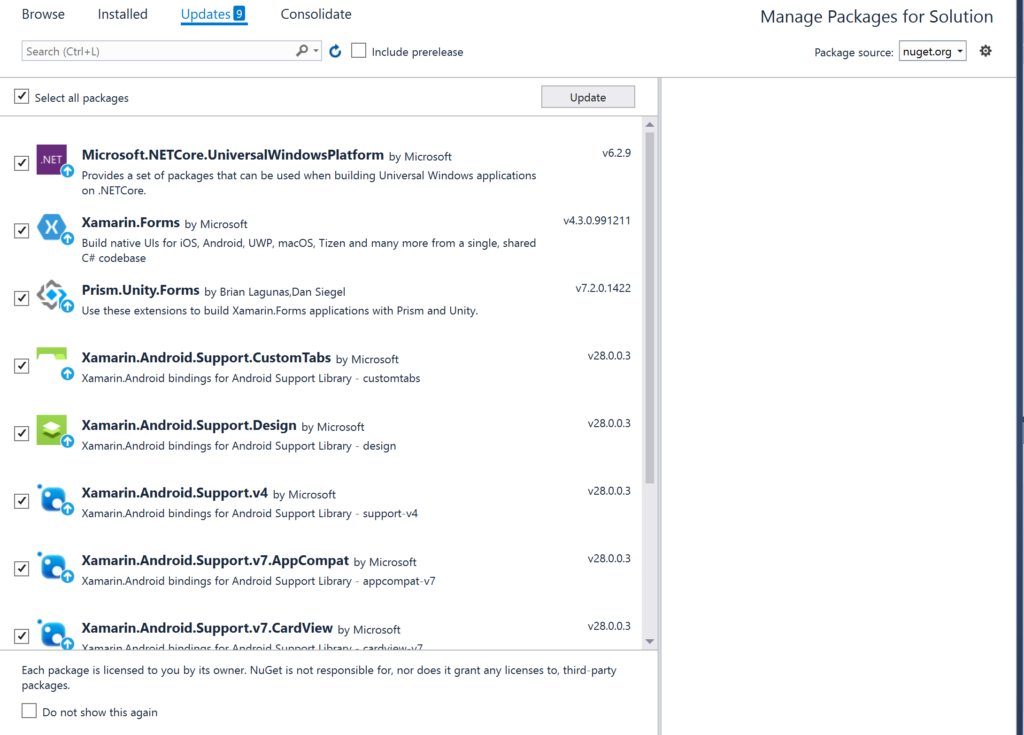
Updating NuGet packages:
Don’t forget to upgrade all NuGet packages to the last version before beginning the development.

In the next post:
In the next post we’ll see how to create login Forms and make the communication between the application and the Web API controllers.
Follow Me For Updates
Subscribe to my YouTube channel or follow me on Twitter or GitHub to be notified when I post new content.

[…] part of tutorial, we ‘ll see how to made Xamarin Forms – Login Page. You can find in the last post the introduction to Xamarin Forms Tutorial – […]
1 Prism Blank App (Xamarin.Forms). This requires Prism Template Pack to be installed.