
In this part of tutorial, we will see how to make Navigation Bottom bar on Android using XAML .
Creating project.
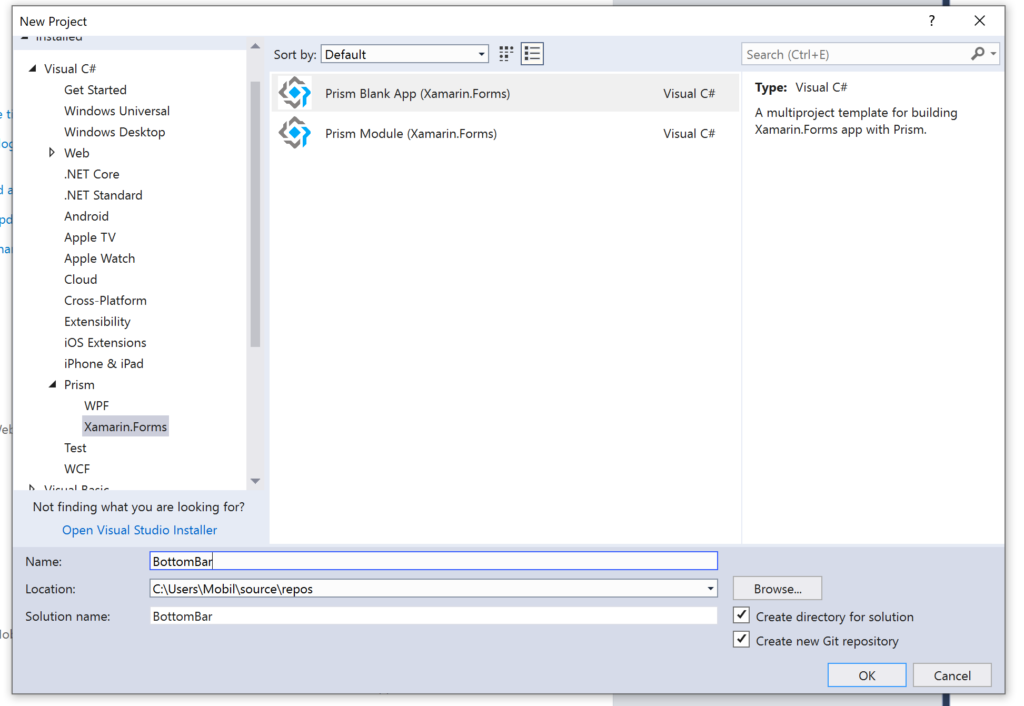
Let’s create a new project called Bottom Bar.
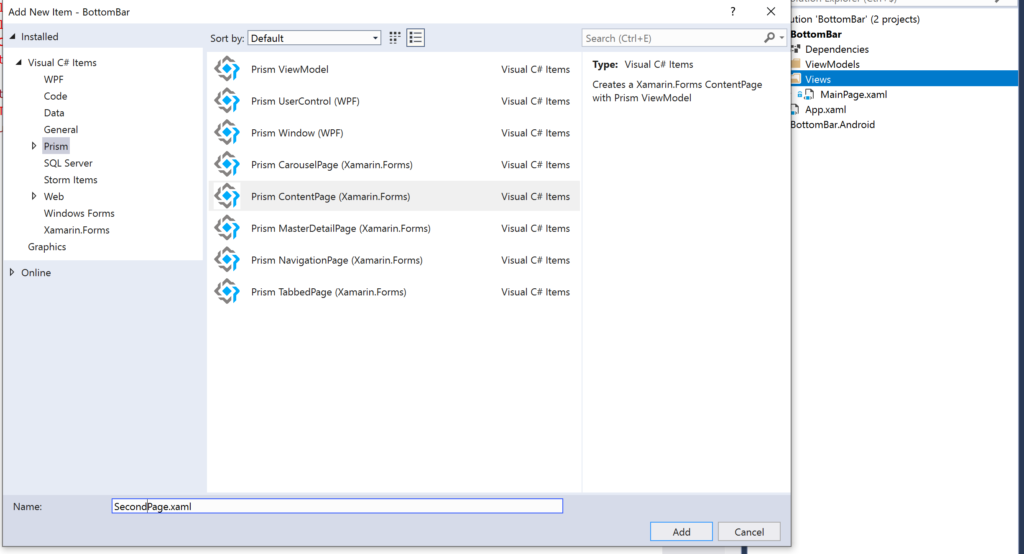
Under the views folder, create 2 new ContentPage item called FirstPage and SecondPage.
In the MainPage.xaml, we need to change the page type from ContentPage to TabbedPage
<?xml version="1.0" encoding="utf-8" ?>
<TabbedPage xmlns="http://xamarin.com/schemas/2014/forms"
             xmlns:x="http://schemas.microsoft.com/winfx/2009/xaml"
             x:Class="BottomBar.Views.MainPage"
             Title="{Binding Title}">

</TabbedPage>
And change the parent class from ContentPage to TabbedPage in MainPage.cs
 public partial class MainPage : TabbedPage
    {
        public MainPage()
        {
            InitializeComponent();
        }
    }
Now, we define the TabbedPage content, by adding the two pages added previously:
<?xml version="1.0" encoding="utf-8" ?>
<TabbedPage xmlns="http://xamarin.com/schemas/2014/forms"
             xmlns:x="http://schemas.microsoft.com/winfx/2009/xaml"
            xmlns:Views="clr-namespace:BottomBar.Views"
            x:Class="BottomBar.Views.MainPage"
             Title="{Binding Title}">
    <NavigationPage Title="First">
        <x:Arguments>
            <Views:FirstPage />
        </x:Arguments>
    </NavigationPage>
    <NavigationPage Title="Second">
        <x:Arguments>
            <Views:SecondPage />
        </x:Arguments>
    </NavigationPage>
</TabbedPage>
When you run the project, you will have the navigation bar in the top.

So we need only to define the position on the Bottom by adding this code :
<TabbedPage xmlns="http://xamarin.com/schemas/2014/forms"
             xmlns:x="http://schemas.microsoft.com/winfx/2009/xaml"
            xmlns:Views="clr-namespace:BottomBar.Views"
            xmlns:android="clr-namespace:Xamarin.Forms.PlatformConfiguration.AndroidSpecific;assembly=Xamarin.Forms.Core"
            android:TabbedPage.ToolbarPlacement="Bottom"
            x:Class="BottomBar.Views.MainPage"
             Title="{Binding Title}">
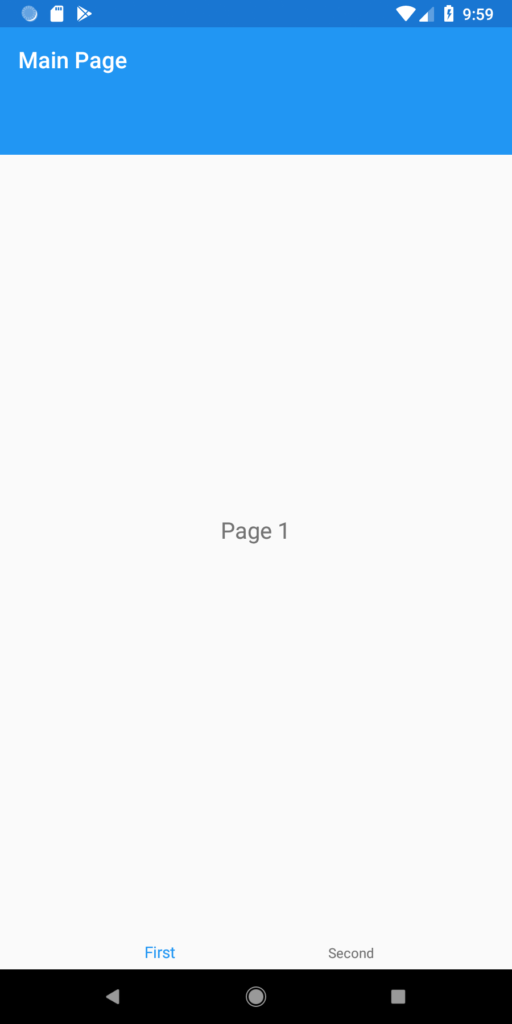
Run the project and you will see that the navigation bar is in the bottom:
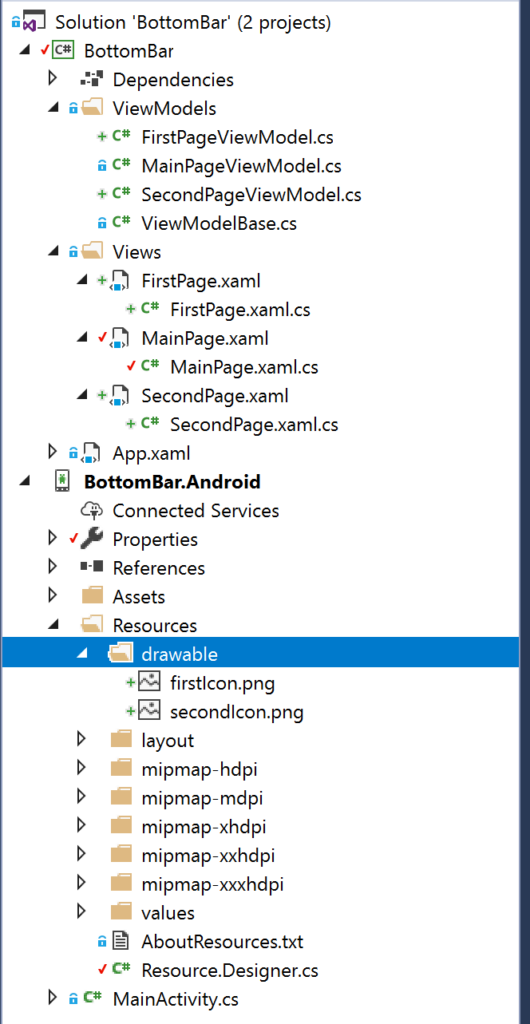
Let’s add some icons for each page title. First of all, you need to create new folder called drawable under Resources folder in Android project and put the icon images:
Finally, add icons in XAML for each page like this code:
<?xml version="1.0" encoding="utf-8" ?>
<TabbedPage xmlns="http://xamarin.com/schemas/2014/forms"
             xmlns:x="http://schemas.microsoft.com/winfx/2009/xaml"
            xmlns:Views="clr-namespace:BottomBar.Views"
            xmlns:android="clr-namespace:Xamarin.Forms.PlatformConfiguration.AndroidSpecific;assembly=Xamarin.Forms.Core"
            android:TabbedPage.ToolbarPlacement="Bottom"
            x:Class="BottomBar.Views.MainPage"
             Title="{Binding Title}">
    <NavigationPage Title="First"
                    Icon="firstIcon.png">
        <x:Arguments>
            <Views:FirstPage />
        </x:Arguments>
    </NavigationPage>
    <NavigationPage Title="Second"
                    Icon="secondIcon.png">
        <x:Arguments>
            <Views:SecondPage />
        </x:Arguments>
    </NavigationPage>
</TabbedPage>
Ass you can see, here, we have a bottom navigation bar with icons:

Follow Me For Updates
Subscribe to my YouTube channel or follow me on Twitter or GitHub to be notified when I post new content.