In this videos, you will learn how to:
- Install bootstrap
- Using router
- DI
- Custom services
- Using HttpClient
- Reactive Forms
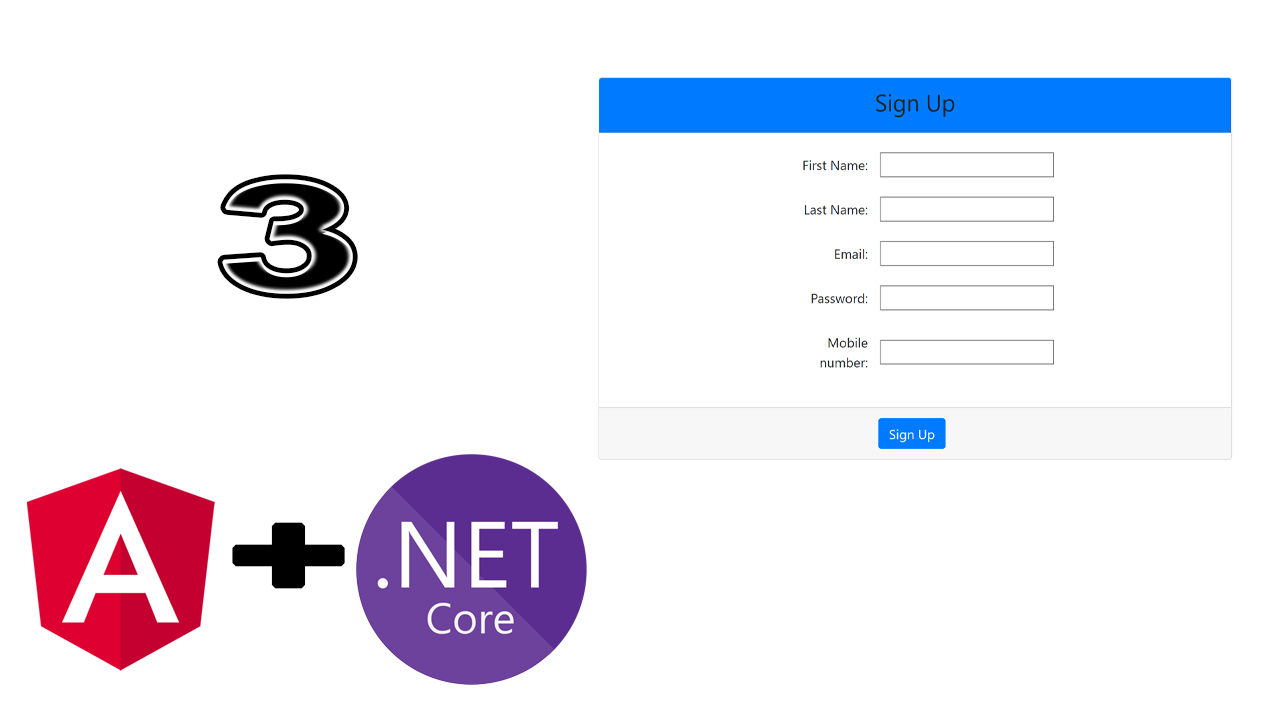
- Sign Up Form
- Send Data from Angular to WebAPI
GhitHub:
Installing Bootstrap:
Fist of all, we need to install Bootstrap package by running the command:
npm install bootdtrapPut the reference of bootstrap CSS file in angular.json
"styles": [
              "src/styles.scss",
              "node_modules/bootstrap/dist/css/bootstrap.min.css"
            ],
Adding NabBar component:
So the navigation bar is a component shared between all application pages. It will be called in the “app.component.html” file.
Let’s create this new component under “menus” folder by running the command :
ng generate component nabBarIn the nav-bar.component.html file, we put this code:
<nav class="navbar navbar-expand-lg navbar-light bg-light">
    <a class="navbar-brand" href="#">Forms</a>
    <button class="navbar-toggler" type="button" data-toggle="collapse" data-target="#navbarNavAltMarkup" aria-controls="navbarNavAltMarkup" aria-expanded="false" aria-label="Toggle navigation">
      <span class="navbar-toggler-icon"></span>
    </button>
    <div class="collapse navbar-collapse" id="navbarNavAltMarkup">
      <div class="navbar-nav ml-auto">
        <a class="nav-item nav-link" routerLink="/SignUp">Sign Up</a>
        <a class="nav-item nav-link" routerLink="/SignIn">Sign in</a>
      </div>
    </div>
  </nav>
In the app.component.html, we delete the default code and replace it by the following line of code
<app-nav-bar></app-nav-bar>
<router-outlet></router-outlet>
Adding SignUp component:
Now, we need to create the SignUp form.
The good recommendation is to use the “ngOnInit” hooks, in order to initialize property or execute an asynchronous task.
After creating the component, we put this code in sign-up.component.ts file:
import { Component, OnInit } from '@angular/core';
import { FormBuilder, FormGroup, Validators } from "@angular/forms";
import { UsersServiceService } from "../services/users-service.service";
import { Router } from "@angular/router";

@Component({
  selector: 'app-sign-up',
  templateUrl: './sign-up.component.html',
  styleUrls: ['./sign-up.component.scss']
})
export class SignUpComponent implements OnInit {

  constructor(private formBuilder: FormBuilder, private usersService: UsersServiceService, private router: Router) { }

  signUpForm: FormGroup;

  ngOnInit() {
    this.signUpForm = this.formBuilder.group({
      firstName: ['', Validators.required],
      lastName: ['', Validators.required],
      email: ['', [Validators.email, Validators.required]],
      password: ['', [Validators.minLength(12), Validators.required]],
      mobileNumber: ['', Validators.required]
    });
  }

  get signUpData() { return this.signUpForm.controls; }

  onSubmit() {
    if (this.signUpForm.invalid) {
      return;
    }
    this.usersService.registerUser(this.signUpForm.value).subscribe(x => { this.router.navigate(["/SignIn"]) });
  }
}
So, we add the “signUpForm” property type of FormGroup, and initialize it by the “formBuilder” service, injected like a private dependency in the constructor. Eventually, we need to define all the validations rules.
Finally, let’s add our Html sign up code:
<form [formGroup]="signUpForm" (ngSubmit)="onSubmit()">
<div class="card text-center w-50 mx-auto mt-5">
    <div class="card-header bg-primary">
        <h3>Sign Up</h3>
    </div>

    <div class="card-body">
        <div class="form-group row d-flex justify-content-center align-items-center">
            <label for="firstName" class="col-form-label col-sm-2 text-right">First Name:</label>
            <input type="text" formControlName="firstName" />
        </div>
        <div class="form-group row d-flex justify-content-center align-items-center">
            <label for="lastName" class="col-form-label col-sm-2 text-right">Last Name:</label>
            <input type="text" formControlName="lastName" />
        </div>
        <div class="form-group row d-flex justify-content-center align-items-center">
            <label for="email" class="col-form-label col-sm-2 text-right">Email:</label>
            <input type="text" formControlName="email" />
        </div>
        <div class="form-group row d-flex justify-content-center align-items-center">
            <label for="password" class="col-form-label col-sm-2 text-right">Password:</label>
            <input type="password" formControlName="password" />
        </div>
        <div class="form-group row d-flex justify-content-center align-items-center">
            <label for="mobileNumber" class="col-form-label col-sm-2 text-right">Mobile number:</label>
            <input type="text" formControlName="mobileNumber" />
        </div>
    </div>
    <div class="card-footer">
        <button class="btn btn-primary mr-2">Sign Up</button>
    </div>

</div>
</form>
The “formControlName” directive is used to syncs a FormControl in an existing FormGroup to a form control element by name.
The [formGroup]=”signUpForm” is the data binding between the form and “signUpForm” property in sign-up.component.ts
Adding Paths:
In app-routing.module.ts, let’s define 2 new routes to SignUp and SignIn pages.
import { NgModule } from '@angular/core';
import { Routes, RouterModule } from '@angular/router';
import { SignUpComponent } from "../app/sign-up/sign-up.component";
import { SignInComponent } from "../app/sign-in/sign-in.component";

const routes: Routes = [
  { path: 'SignUp', component: SignUpComponent },
  { path: 'SignIn', component: SignInComponent },
];


@NgModule({
  imports: [RouterModule.forRoot(routes)],
  exports: [RouterModule]
})
export class AppRoutingModule { }
Don’t forget to import ReactiveFormsModel and HttpClientModel in “app.module.ts”
import { BrowserModule } from '@angular/platform-browser';
import { NgModule } from '@angular/core';

import { AppRoutingModule } from './app-routing.module';
import { AppComponent } from './app.component';
import { NavBarComponent } from './menus/nav-bar/nav-bar.component';
import { SignUpComponent } from './sign-up/sign-up.component';
import { ReactiveFormsModule } from "@angular/forms";
import { SignInComponent } from './sign-in/sign-in.component';
import { HttpClientModule } from "@angular/common/http";

@NgModule({
  declarations: [
    AppComponent,
    NavBarComponent,
    SignUpComponent,
    SignInComponent
  ],
  imports: [
    BrowserModule,
    AppRoutingModule,
    ReactiveFormsModule,
    HttpClientModule
    ],
  providers: [],
  bootstrap: [AppComponent]
})
export class AppModule { }
Creating UsersService:
In order to send date from Angular site web to Web API, wen need to defines the different methods like “register” “GetUsers”…
So, let’s run this command:
ng generate Service usersInside the users.service.ts:
import { Injectable } from '@angular/core';
import { HttpClient, HttpHeaders } from "@angular/common/http";
import { UserModel } from "../models/user-model";

@Injectable({
  providedIn: 'root'
})

export class UsersServiceService {

  httpOptions = {
    headers: new HttpHeaders({ 'Content-Type': 'application/json; charset=utf-8'})
  };

  private baseUrl = "/api/Users";
  constructor(private httpClient: HttpClient) { }

  registerUser(userModel: UserModel) {
    return this.httpClient.post<UserModel>(this.baseUrl, userModel, this.httpOptions);
  }
}
Adding proxy file config
Since we have two different websites, one for Angular and the other for the WEB API.
HttpClient can not directly launch operations (GET, POST…) (what is called cross domain) for security reasons. That’s why we need to add proxy config file in Angular to work around the problem:
{
    "/api/": {
        "target": "http://localhost:14957",
        "secure": false,
        "changeOrigin": true
    }
}
All you need now, running the server by the command:
ng serve --proxy-config proxy.conf.jsonFollow Me For Updates
Subscribe to my YouTube channel or follow me on Twitter or GitHub to be notified when I post new content.

Hi there, You’ve done a great job. I will certainly digg it and personally suggest to
my friends. I am confident they’ll be benefited from this website.
Thanks for finally writing about >Angular 8 with ASP.Net Core Tutorial part 3 Sign Up Form
– Learn Technologies <Liked it!
Awesome post.